So you just want to begin. The TeX Users Group website has a Getting Started Page with the essentials: introductory documents, examples, and, most importantly, links to the software itself: TeX Live on Unix, MacTeX on Mac, proTeXt on Windows (all free, and rather enormous, downloads). If you are on a Mac, look for the TeXShop application; if you are on Windows, look for TeXnicCenter. If Unix, pffft; open up an xterm and vim/emacs. However you do things, here is a file to start playing around with: xelatex.sample.tex. If your setup is working like mine—and if you have the fonts I use—you should be able to typeset it with XeLaTeX and get a result that looks like this: xelatex.sample.pdf.
Engines
In the rest of this post, I’ll walk through that source file, but before we can do that, there’s one technicality to get out of the way: what engine will you use? The engine is the program that converts your TeX source code into a presentational format like PDF. TeX has been around long enough to have developed a bunch of variants, each with their corresponding processing engine. First of all there’s the contrast between the original or “plain” TeX and LaTeX. Plain TeX is a specialist taste. Stick with LaTeX, which is easier and much more in the spirit of contemporary document markup (XML, etc.). A TeX distribution comes with three important LaTeX engines: latex, pdflatex, and xelatex. (There are more out there, but never mind them).
How do you use an “engine”? If you are working in a graphical front-end program, look for a pulldown menu that allows you to choose one. Here is what it looks like in the MacOS program TeXShop: 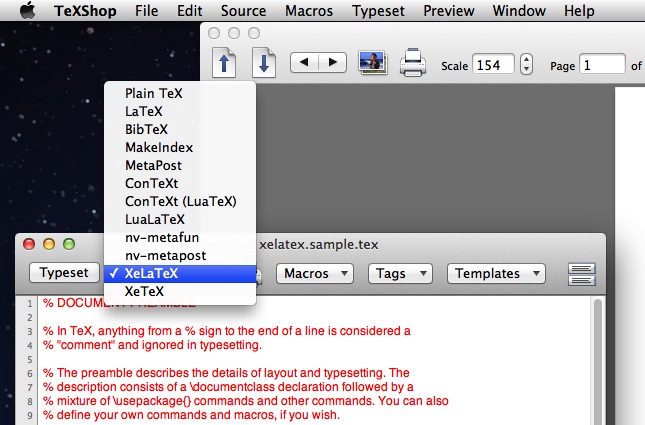
Click the “Typeset” button to produce a PDF. TeXShop will automatically use pdflatex if you choose “LaTeX” from its menu. I think that’s a bit confusing.
If you like the command line, the command is simply
[ENGINE] [FILENAME]
as in
xelatex my-article.tex
Classic latex processes LaTeX source into DVI (“device independent”) format, a TeX-specific filetype devised in pre-PDF days. At this stage, think no more about it.
pdflatex processes LaTeX source directly into PDF. Pretty much anything you can latex you can pdflatex. If you are reading introductions to LaTeX (or Mittlebach and Goosens’s big reference book, the LaTeX Companion) and you want to try out their example code, try it in pdflatex.
xelatex processes XeLaTeX source to PDF. XeLaTeX source is LaTeX with a certain preamble and Unicode characters used freely throughout. Unlike (pdf)latex, xelatex uses your system fonts.
I think the font-and-Unicode combo is compelling enough that humanists should use XeLaTeX, so for the rest of this post I’ll talk about that. But if you run into trouble, try switching to pdflatex.
Here is a sample file in LaTeX, to be processed with pdflatex: pdflatex.sample.tex. Its output should look like this: pdflatex.sample.pdf. Enjoy!
A minimal sample document
But on to the promised description of the sample.
A LaTeX document has two sections, the preamble and the body. Ideally the preamble describes the details of the appearance of the final page, whereas the body describes the structured content of the document. The preamble commands are trickier to master than the body commands, so what you really need is someone else’s preamble to get you going. I’ll talk about the body first and then come back to the preamble.
In general
Here are the most important things about TeX syntax.
- A comment begins with a
%sign. Everything from%to the end of a line is ignored by the typesetter. - TeX commands—instructions to the typesetter—always begin with
\. - What programmers call the grouping operator—used to delimit blocks of code and parameters to commands—is the curly brace,
{}. - Optional parameters to commands use square brackets,
[].
The body
The body begins, naturally enough, with the command \begin{document}. It ends with \end{document}. In general, simply type the text you want set. TeX turns multiple spaces into just one space, and it ignores single carriage returns.
Paragraph breaks are made with one (or more) blank lines. The nature of a paragraph break—how much to indent the paragraph, whether to leave extra whitespace between paragraphs—is an aspect of layout and as such should be specified in the preamble. A forced line break is made with a double backslash, \\.
Two more idiosyncracies. TeX always produces curly quotes, but you must tell it which kind you want. Double quotes are typed as double backticks `` and double apostrophes ''; single quotes as ` and '; and the apostrophe as itself '. A good TeX editor will automatically type these for you when you type a regular double quote. (In TeXShop, you’ll have to make sure Source > Key Bindings > Toggle On/Off is checked.)
TeX also cares deeply, very deeply, about dashes. The em dash is written as a triple hyphen, ---, the en dash (for e.g. ranges of numbers like 4–5) as --, and the hyphen as itself, -.
That’s almost it! If all you’re doing is writing free-form paragraphs, as in a blog post, you know what you need. But if your document has more structure, you need to know some LaTeX markup commands.
The simplest one is emphasis: \emph{my emphasized text}. To understand the difference between typesetting italic font and marking up emphasis, consider that you can nest emphasis commands: \emph{my emphasis has a \emph{further} emphasis within it}. The inner emphasis appears in roman type, as it should.
And the favorite humanist command: \footnote{my footnote text}. This is the kind of thing where LaTeX really shines. You put the footnote command right where you want the note “anchor” (i.e. the little superscript number) to appear, so you never lose track of how your notes and your body text are related. LaTeX numbers your notes for you and thinks hard about how best to lay out your pages, deciding if it’s necessary to continue footnotes onto the next page, making sure your body text fills out the page, and so on.
Then there are commands that describe the structure of the document. In LaTeX these are called \section{}, \subsection{}, and \subsubsection{}. The title of the section goes in between the braces. If you specify \documentclass{book} (see the discussion of the preamble below) then you can also use \chapter{}. All these commands not only typeset your section headings distinctively, but can also number them (if you wish) and remember them for a table of contents (if you wish).
A little more complex is the construct called an environment. These are made up of two commands: \begin{environment-name} and \end{environment-name}. Between these two statements comes text that you want typeset differently from body paragraphs. The most important one for the humanities is the quote environment for blockquotes. There is also a verse environment, as well as listing environments for numbered or bullet-pointed lists. Bullet points are distasteful, but numbered lists are useful. They begin with \begin{enumerate} and end with \end{enumerate}. Each item begins with the command \item, which LaTeX converts to the item number.
And that’s really it.
The preamble
As I say, the preamble is a bit trickier, and it’s probably best to begin with someone else’s preamble and modify it to suit. But the basic idea is straightforward.
First you declare the “class” of the document: the important ones are article and book. The declaration also specifies a base point-size as an option:
The rest of the preamble combines invocations of packages and layout commands. Packages are self-contained modules of code that extend LaTeX’s capabilities, either by modifying what existing commands do or by giving you access to new commands. LaTeX is supported by an enormous open-source library of packages called CTAN (large chunks of which will be installed with your latex distribution). A package is invoked with the command \usepackage[options]{package-name}.
pdflatex doesn’t need anything before the begin{document}. XeLaTeX documents always start, after the document class declaration, with the following package invocations:
 \usepackage{fontspec}
 \usepackage{xunicode}
 \usepackage{xltxtra}
Then comes a font declaration:
\defaultfontfeatures{Ligatures=TeX,Numbers=OldStyle}
\setmainfont{Hoefler Text} % Or the full name of any other font on your system
It is rather disconcerting for first-time users to discover that by default LaTeX has big margins. The margins are chosen to make your lines not too wide—the typical 6-inch line of a word-processed document is much longer than any book designer would use for 12-point font in most cases. But this may look too odd when you begin. Fortunately the geometry package gives you an easy way to reassert control:
\usepackage{geometry}
\geometry{width=6 in,height=8.5 in}
If you really want that Microsoft Word-y look, you can doublespace:
\usepackage{setspace}
\doublespacing
Though very elaborate things are possible with headers and footers in LaTeX (look up the fancyhdr package), the next command gives you a barebones page-number-footer:
\pagestyle{plain}
Finally, you may be mystified about those numbered sections. The following incantation ensures that no section numbers will be typeset:
\setcounter{secnumdepth}{-2}
To be continued!
That should be all you need to start experimenting. There’s much more to play with—e.g., bibliographies and citations, images, and of course mathematical equations—but this should be enough to get things underway.
I recommend continuing by looking at Tobias Oetiker’s Not-So-Short Introduction to LaTeX2e. Contact me or comment here if you like, too!
Edit 3/10/12: Changed sample file links to point to their new home, in a repository on github.